Showing posts with label appetizer. Show all posts

Guacamole

Guacamole is one of my favorite dips. I enjoy it with corn or tortilla chips, and as a topping in my beef burger.

Guacamole is very easy to make and you don't have to make it hours in advance, as it is very quick to make. If you have the ingredients on-hand, it is a last minute snack or appetizer when unexpected guests stop by for a drink.


To make my guacamole I use a pestle and mortar. But if you don't have one, use a potato masher and a bowl.

For 4 to 6 servings, you will need:
  • 2 large, ripe avocados
  • One small red onion, for 2 tablespoons  
  • A large handful of fresh cilantro, for 2 tablespoons
  • One tomato, for 3 tablespoons
  • One chili, for 2 tablespoons*
  • 1/2 teaspoon of salt
  • 1/2 teaspoon of cayenne pepper*
  • 1 tablespoon of lime juice


Preparation time: 10 minutes

For the guacamole preparation, don't crush the ingredients to a paste, because you want a nice chunky texture at the end.

Start by dicing the red onion into small pieces and loosely dicing the cilantro.


Then, peel the tomato - I like it that way, so you don't end up eating pieces of tomato skin - and dice it. Finally, dice the chili. Reserve the diced tomato and chili until it is time to incorporate it to your preparation.


Crush the diced red onion and cilantro together in a mortar with the pestle.


Add the salt, cayenne pepper, diced tomato, and diced chili into the mortar and crush with the pestle.


Peel the avocado, remove the pit, and cut it into large chunks. Add the avocado chunks and the lime juice into the mortar and loosely crush with the pestle.


That was easy! Your guacamole is ready! Reserve it in the fridge tightly sealed until serving.


*Note: You can deseed the chili and substitute the cayenne pepper with paprika if you want your guacamole mild.

As with all the other recipes we put on this site, this is meant to be easy to follow. We are hobby chefs who love to cook, and we are always up for learning new techniques. If you know of anything in this recipe which can be done a different way, whether for increased ease of preparation or better taste, please add a comment below!

Whipped up by Charline Leblond

Salsa

Salsa picante! Corn chips! A good refreshing beer or a nice Margarita! Sounds like a good start for your evening.

Salsa is a very easy dip to prepare. You can adjust it to your taste, don't feel bad if you only add one chili or if you de-seed the chillies. It's fine, and it will still be tasty, and not too spicy.

Anyway, let's get started with this quick and simple salsa.


For about two cups to two cups and a half of salsa, you will need:
  • 400g of diced tomatoes*
  • A glove of garlic
  • 1/2 a big onion
  • 2 chillies
  • A handful of fresh cilantro
  • Some salt and pepper to taste
  • A spritz of lime juice


Preparation Time: 10 minutes


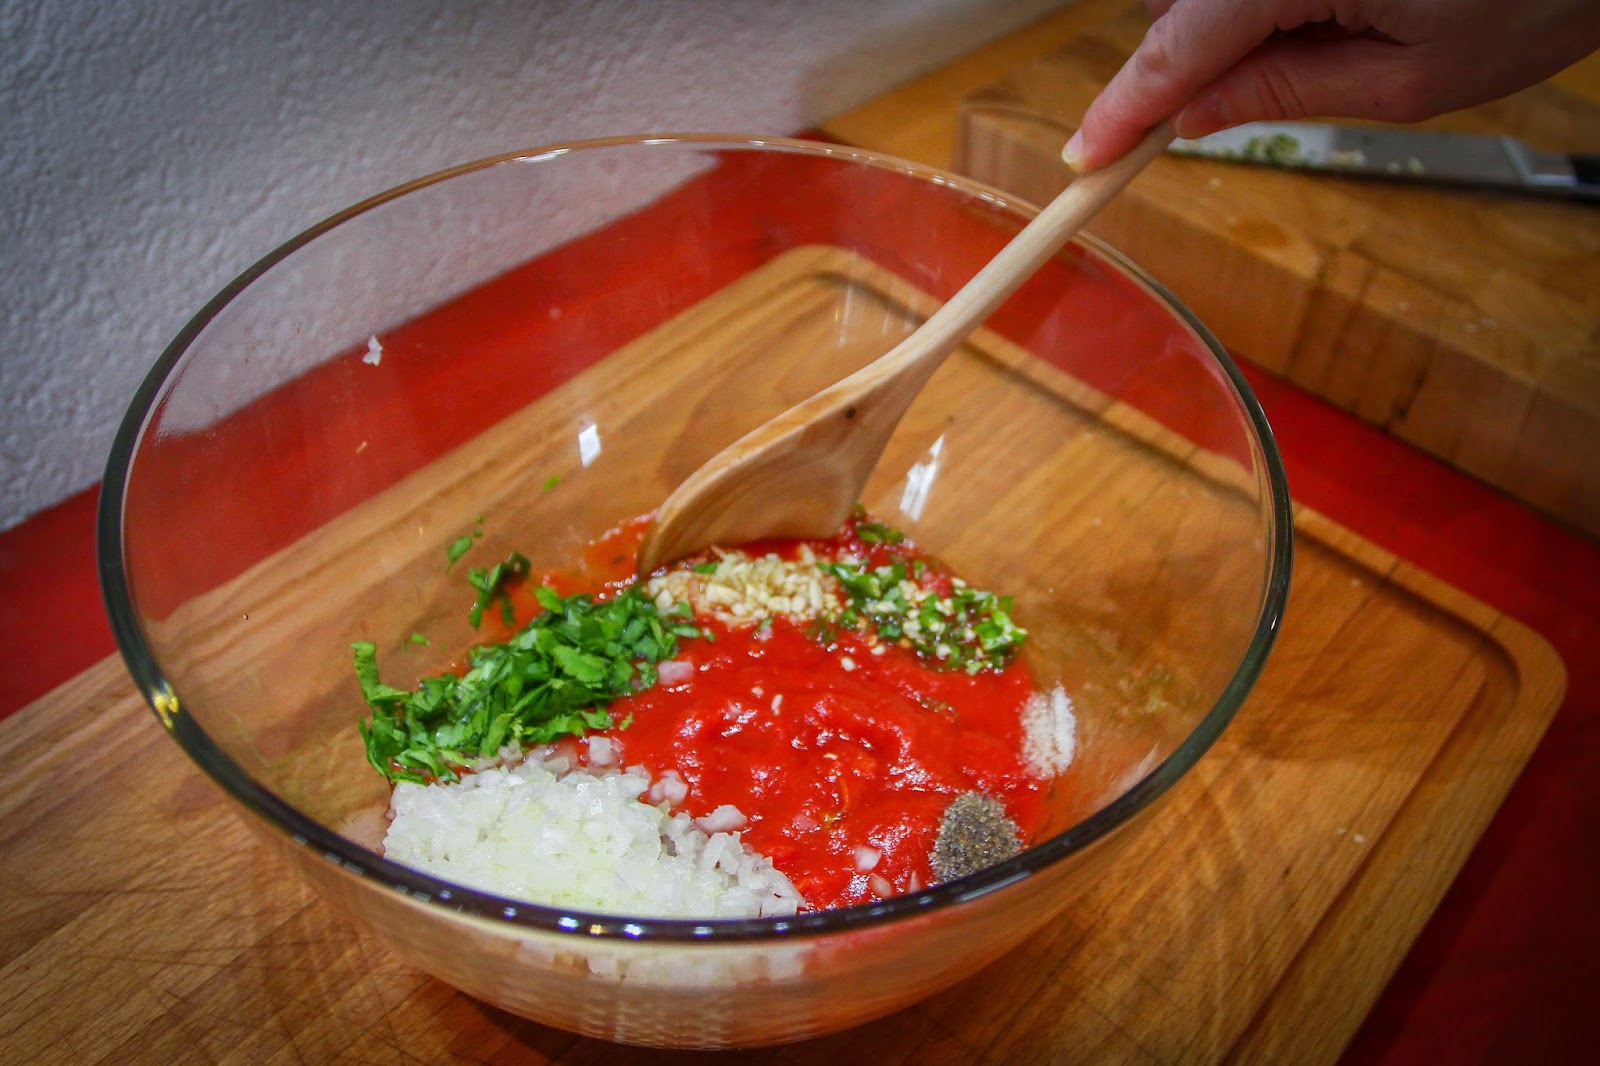
Start by finely dicing your ingredients; the glove of garlic, the 1/2 onion, the chillies, and the fresh cilantro.


In a bowl, add your diced tomatoes, the diced ingredients, and the salt and pepper.


Mix them so that the ingredients combine nicely together.


You just made your own salsa! That's it! Wasn't it easy?! So, no more need for those pre-made jars.

Cover your bowl and keep in the fridge until serving.

Before serving, give the salsa a good stir, and add a spritz of lime juice on top.


*You can use a can of diced tomatoes, or use fresh tomatoes finely diced or crushed with a hand mixer.


Tip: If you have some salsa leftovers, use your salsa to make enchiladas. Try our Chicken Enchiladas.

You can also use it to make a spicy omelet or some spicy scrambled eggs. Or, use the salsa to give a kick to your mac & cheese.


As with all the other recipes we put on this site, this is meant to be easy to follow. We are hobby chefs who love to cook, and we are always up for learning new techniques. If you know of anything in this recipe which can be done a different way, whether for increased ease of preparation or better taste, please add a comment below!

Prunes Wrapped in Bacon

This sweet and savory appetizer will delight your taste buds. The sweetness of the prune and the smokiness and saltiness of the bacon make a delicious combination. And let's not forget the meltingly soft texture of the prune and the crispiness of the grilled bacon. And the icing on the cake is the fact that the preparation of your appetizer will be wrapped up in no time.


Just a piece of advice before starting: These appetizers have to be eaten hot or warm.*

The following quantities are for 33 prunes wrapped in bacon, so feel free to adjust the quantities if you are cooking for more or fewer guests (I counted about 5 prunes wrapped in bacon per person).

You will need:
  • 33 pitted ready-to-eat prunes
  • 11 slices of bacon
  • 33 toothpicks

Preparation time: 10 minutes
Cooking time: 10 minutes

Start by pre-heating your oven at 200 C (392 F).*

Cut the bacon slices into the right length (the right length should be one and a quarter times the diameter of the prune).


While your oven is pre-heating, prepare your appetizer by rolling each prune in a slice of bacon.


Place the prunes wrapped in bacon on a parchment paper sheet, on an oven tray.


Place the tray in the pre-heated oven and cook for about 10 minutes, then place them under the grill for about 2 minutes, or until the bacon is grilled.

Insert a toothpick into each prune.

Serve hot or warm.


Enjoy!


*Note: You can prepare your prunes wrapped in bacon per advance, leave them in the fridge, and heat them just before serving.

As with all the other recipes we put on this site, this is meant to be easy to follow. We are hobby chefs who love to cook, and we are always up for learning new techniques. If you know of anything in this recipe which can be done a different way, whether for increased ease of preparation or better taste, please add a comment below!

Pineapple and Shrimp Verrines

These verrines are easy to make and, aside from the fact you have to do it in two steps (the marinade taking the longest time), quite fast. They are refreshing and will be ideal either for a light starter or an appetizer.


For 4 verrines, you will need the following ingredients:
  • About 20 shrimp
  • One tablespoon of curry powder
  • A good-size handful of coriander leaves
  • A can of 550 grams of cut or sliced pineapple
  • The pineapple juice of the same 550 grams of cut or sliced pineapple

Preparation time: 20 minutes
Marinating time: 4 to 8 hours


Start by your marinade, as it will have to rest for a few hours.

Cut the head of your shrimp and peel them.


Roughly chop the coriander.


In a container, pour the pineapple juice, then add the curry powder. Add the chopped coriander, and mix a bit.


Add your peeled shrimp.


Cover with a plastic film, and place in the fridge for 4 to 8 hours to let the marinade infuse the shrimp.


Place your pineapple pieces in a blender and mash them into a puree. It is your choice whether or not to leave pieces, my preference being having a few half-mashed pieces here and there.


Cover with a plastic film, and place in the fridge.


Hours after the marinade has been in the fridge, and just before your dinner starts, cut the marinated shrimp into pieces, but don't forget to keep 4 whole shrimp for the decoration.


It is now time to assemble your verrines.


To do so, it will take you only four simple steps.

The first step is to pour the mashed/pineapple purée as the bottom layer.


The second step is to add the marinated cut shrimp pieces as the second layer.


The third step is to place a shrimp on the side of your verrine. You can cut a little notch into your shrimp to help it hold on to the edge of the verrine.


The four step is to add few pieces of chopped coriander on top of the marinated cut shrimp pieces.


The final step is to serve and enjoy!


*Tip: Don't throw away your leftover pineapple pieces, refer to our "Let's not waste anything!" page, and check out few ideas on how to use them.

As with all the other recipes we put on this site, this is meant to be easy to follow. We are hobby chefs who love to cook, and we are always up for learning new techniques. If you know of anything in this recipe which can be done a different way, whether for increased ease of preparation or better taste, please add a comment below!

Whipped up by Charline Leblond