Showing posts with label rice. Show all posts

Risotto with Chorizo and Sun-Dried Tomato

I love experimenting with different flavour combinations, and I often cross foods and ingredients from one dish to another. We love using the Chorizo and Sun-Dried tomato combination, from savoury cookies to pizza toppings, and so I thought to myself, "why not risotto?" So, I tried it and it was delicious! I find that the gamut of flavours provided by the primary ingredients is enough for the dish, and there is really no need for additional spices or herbs. But that is just me; feel free to spice up this dish as you like.


For 2-3 people, you will need:
  • 250 grams of arborio rice
  • 100 grams of chorizo, sliced*
  • 80 grams of sun-dried tomatoes***
  • 1 litre of chicken stock (or vegetable stock)
  • 250 millilitres of white wine**
  • 15 grams of butter
  • 1 small shallot, diced
  • 1 tablespoon of olive oil
  • 1/2 cup of parmesan cheese (ideally freshly grated)

* I am using cured chorizo, therefore I don't cook it beforehand. If you are using fresh chorizo, the same recipe will work after you cook your chorizo. Do not add uncooked chorizo to your risotto!

** You can replace the white wine with chicken stock, if you prefer.


Preparation time: 5 minutes
Cooking time: 20 minutes


I'll just stress one point before we begin; risotto is a dish that takes more active time than most other dishes. By this, I mean you will be constantly engaged with the dish and won't have much time to run off and do something else quickly. Therefore, it is imperative that you have your preparation, or mise-en-place, ready to go before you begin cooking (as pictured above).


Start with a large frying pan on medium-high heat, add the olive oil and the shallots.


Fry the shallots until browned.


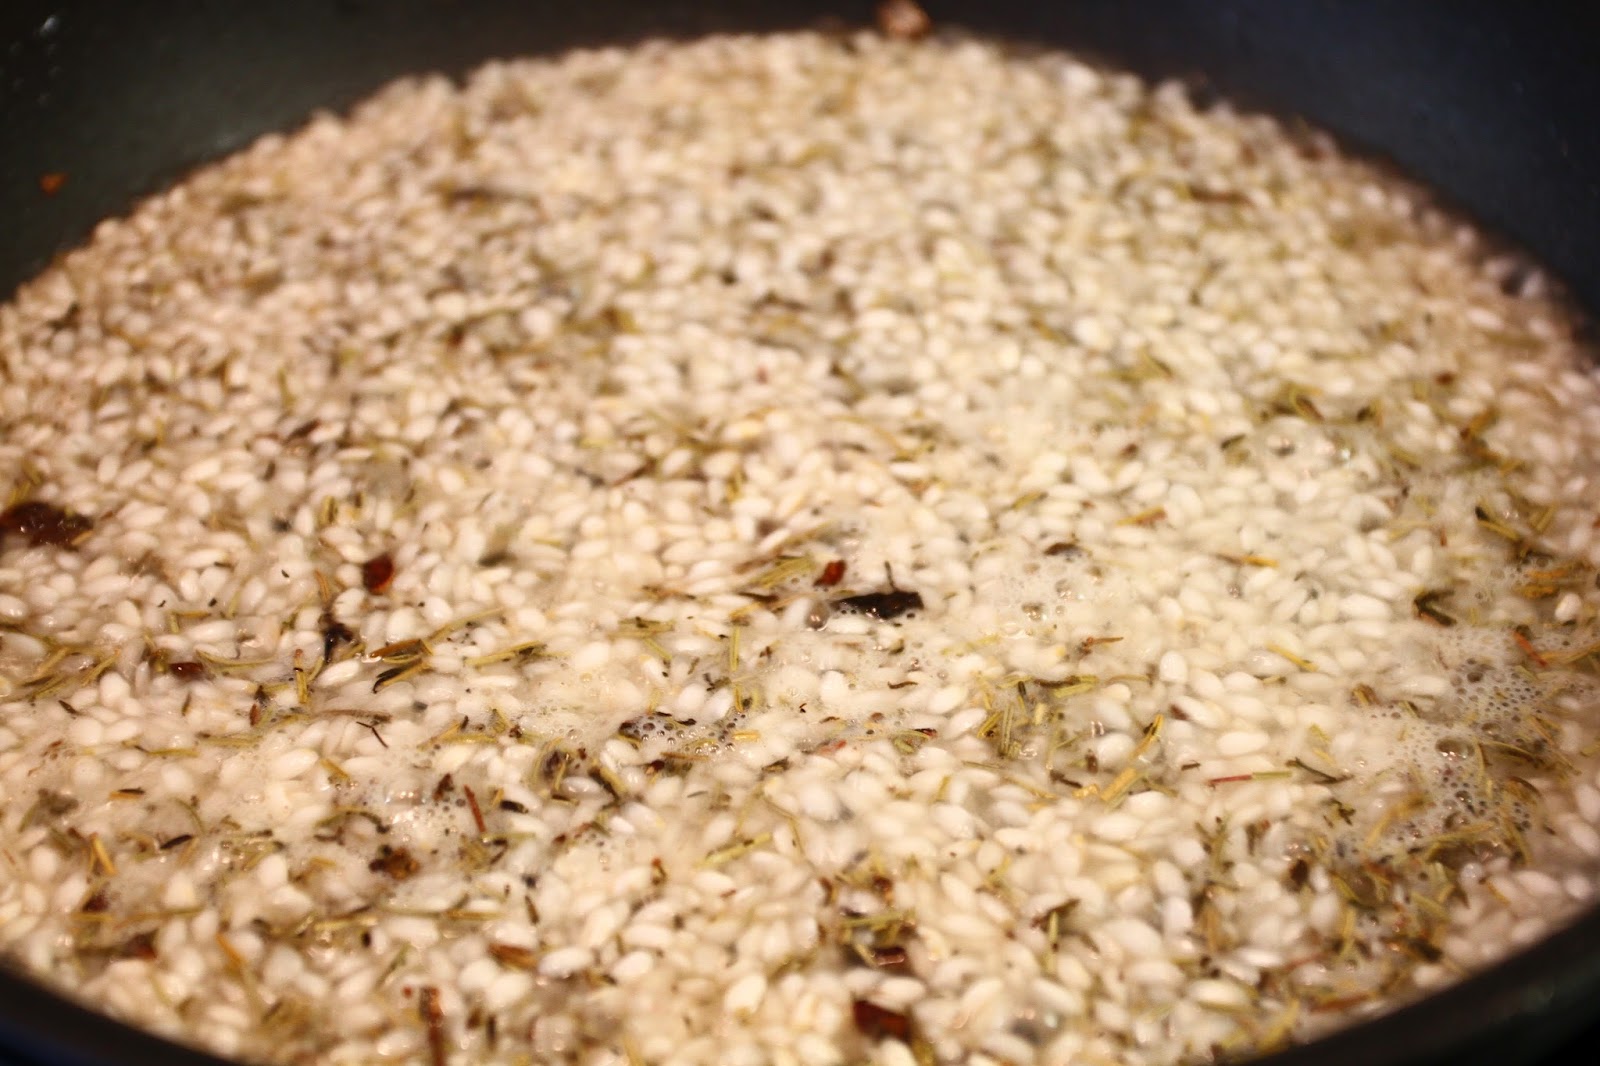
Now reduce the heat to low, add your arborio rice, and stir the rice around the pan for about 30 seconds.


Add the white wine by pouring it all over the rice, and keep gently stirring.


In a few minutes, the wine will get absorbed by the rice, and the liquid in the pan will begin to disappear as you stir. What you are looking for is a texture that, when separated by the spatula, is not liquid enough to rejoin.


This is the time to add more liquid. Now we start with the chicken stock, adding one ladle at a time.


And again, constantly stir until you can separate the risotto with a spatula.


The key to a lovely, creamy risotto is adding just one ladle at a time.


And letting it all get absorbed.


After the third time ladling in your broth, taste one grain of rice before each new ladle to check the doneness of the rice. It might take you 20 minutes, or 750 ml of broth before your risotto is ready, but it depends on so many factors such as temperature, concentration of broth, variety of arborio, that it is better for you to check your own risotto.

When it is al dente, add the chorizo and sun-dried tomatos.


And stir them into the risotto, adding one last ladle of broth.


Allow it to simmer for half a minute, then remove from heat, add the butter and parmesan and mix. It may look like there is a lot of liquid in the pan, but it will get quickly absorbed, leaving you with a creamy and soft risotto. If you continue on heat until the liquid is fully absorbed, the risotto will dry out before serving.


And finally, plate and serve with parmesan slices (not shown). As a side dish, some blanched green beans would be delicious and aesthetically pleasing.


Note: You can see from the photos that I used whole pieces of sun-dried tomatoes. You might want to cut them into smaller, bite-sized pieces, as the large wholes can be a little cumbersome when eating.

***Tip: Don't throw away your sun-dried tomatoes, refer to our "Let's not waste anything!" page, and check out few ideas on how to use them.

As with all the other recipes we put on this site, this is meant to be easy to follow. We are hobby chefs who love to cook, and we are always up for learning new techniques. If you know of anything in this recipe which can be done a different way, whether for increased ease of preparation or better taste, please add a comment below!

Whipped up by Shyamal Addanki

Lemongrass and Basil Chicken Curry

This is a quick and easy curry to whip together when you have that craving anytime during the week; yes, you even have time to make if after you get back from work! A lot of people get scared out of making curries and opt to use pre-made curry mixes in a jar, but this is very easy, and you can control how spicy you would like it to be. As I have made it below, it was not too spicy at all, which really allowed the lemongrass and ginger to come forward and support that fresh basil flavour.


For this dish, serving 2-3 people, you will need:
  • Half an onion, chopped.
  • Roughly 1/3 cup of chopped ginger*, or ginger powder.
  • 4 stems of lemongrass.
  • One clove of garlic, chopped.
  • Half a cup of basil leaves.
  • One tablespoon of curry powder.
  • 500 milliliters of chicken stock.
  • 3-4 pieces of chicken, as desired.
  • One can of coconut milk.
  • 1/3 cup of chopped green chilies (optional).
Preparation time: 15 mins
Cooking time: 20 mins

I made my own curry powder for this, using some cayenne pepper, yellow curry powder, paprika, turmeric, and some other pantry staples, but you can pretty much use any store-bought brand. Naturally, the taste of this curry will change depending on the powder you use, and that will also allow you to control the spiciness. You will note that I did not add any chillies! Feel free to chop up about 1/3 cup of green chilies for an awesome flavour kick ... I cannot find good green chilies where I am at the moment, so I had to do without.


Okay, first we need to tackle that lemongrass. If you are using lemongrass powder, just add it with the rest of the curry powder below.

Remove the outer husk of the lemongrass, we aren't going to eat this bit.


Next, chop that lemongrass up into little pieces.


Get your chicken stock to a boil and add the lemongrass directly into it. This will serve two purposes; it will infuse your stock with the lemongrass flavour, and it will soften the lemongrass.


Meanwhile, heat some oil in your skillet or wok.


Add the onions, garlic, and ginger, and fry them until the garlic starts becoming golden brown.


Then add the curry powder to the ginger, garlic, onion mixture and mix it in well.


Once the curry powder is well mixed with the onion, garlic, and ginger, add your chicken to the pan. I had drumsticks left over, so that is what I am using. Normally, I prefer chicken thighs for a curry.


Turn your chicken around to get it nicely coated with the curry and spices and brown the chicken.


Once the chicken is browned, add your chicken stock and lemongrass to the pan.


Throw in your basil leaves, cover the dish, and leave it for 10-15 minutes to let the chicken finish cooking.


Once the chicken is cooked, add your coconut milk and mix it in well.


Let it stew for a couple of minutes, and then serve with some warm rice!


*Tip: Don't throw away your ginger! Refer to our "Let's not waste anything!" page, and check out few ideas on how to use your leftover ginger.

As with all the other recipes we put on this site, this is meant to be easy to follow. We are hobby chefs who love to cook, and we are always up for learning new techniques. If you know of anything in this recipe which can be done a different way, whether for increased ease of preparation or better taste, please add a comment below!

Whipped up by Shyamal Addanki

Pineapple Teriyaki Chicken with a Honey Ginger Glaze

This is a lovely, silky chicken dish with a lip-smacking sweet and tangy glaze. Preparation is ridiculously easy and ingredients are readily available in most supermarkets. You can make your own teriyaki sauce if you like, but I just used the bottled sauce in this recipe.


Ingredients for 4-5 servings:
  • 600 grams or so of chicken, cut into small pieces
  • 1/2 cup teriyaki sauce
  • Two, 1/3 cups of honey (divided)
  • 300 grams of tinned pineapple*
  • About a cup of fresh coriander
  • Tablespoon of ground ginger

To start, whisk together the teriyaki sauce, half a cup of juice from the tin of pineapples, and the first 1/3 cup of honey. A whisk is the best way to get the honey really well incorporated; a spoon will just make honey streaks in your teriyaki sauce.


Next, add about half a cup of coriander.


And finally your chicken pieces and a pinch of salt, and mix to get the chicken coated evenly.


Cover this and refrigerate for an hour or so.


When you are ready to start putting dinner together, cut up your pineapple into small pieces (if it wasn't already in pieces).


In a hot pan, or a wok, add your mixture that has been marinating. 


Let the entire thing come to a boil, and keep turning the chicken around with a spatula. Do not reduce the heat, there is enough liquid for the chicken to cook at high heat.


When your chicken is no longer pink on the outside, add about a cup of the pineapple pieces. You can always add more or less to your liking. If you reserve some fresh pieces, you can serve them on the plate with the chicken.


Keep stirring the mixture as the liquid boils for about 5 more minutes, and then check to verify that your chicken is cooked through. I added a few chilli flakes at this stage to provide some spice. Once your chicken is cooked, take out the chicken and pineapple and set aside (a slotted spoon would work best), leaving the liquid in the pan.


Keeping the pan on high heat, add the ground ginger, or ginger powder, into the sauce and the remaining 1/3 cup of honey. Stir frequently, this mixture is going to caramelise and become syrupy very quickly. In fact, it would help if someone was plating the chicken while you finish the sauce.


Finally, serve the chicken with some plain rice, and fresh pineapples. Pour about two tablespoons of sauce over the chicken and garnish with the coriander.


*Tip: Don't throw away your unused pineapple pieces, refer to our "Let's not waste anything!" page, and check out few ideas on how to use them.

As with all the other recipes we put on this site, this is meant to be easy to follow. We are hobby chefs who love to cook, and we are always up for learning new techniques. If you know of anything in this recipe which can be done a different way, whether for increased ease of preparation or better taste, please add a comment below!

Whipped up by Shyamal Addanki

Mushroom Risotto

Risotto with portobello and parmigiano reggiano ... try staying that three times really fast. Its fun! But you know what is more fun, and more productive? Cooking it.

Risotto is one of those dishes that is famous for being unique to each chef; few follow any prescribed recipe, and neither should you. Take this as a simple guide on the overall steps but feel free to experiment around. I'm creating a basic mushroom risotto with portobello, because that is what I found in my local grocery store. Hopefully you live in a place with a better selection of groceries than that.

If you want to pluck some wild mushrooms for the risotto, then do so at your risk. I take no responsibility for any pink elephants that trample through your kitchen and eat your coconut tree sculpture.


For this recipe (for two people) you will need:

  • 4 medium sized portobellos*
  • 2 small shallots
  • 2 small cloves of garlic (or one large)
  • 150 grams of Arborio Rice
  • Roughly half a cup of white wine
  • 500 milliters of chicken broth (vegetable broth works fine too), kept warm in a pan
  • 1 tablespoon of crème fraîche
  • Some thyme, rosemary, salt, pepper and olive oil.

And about 45 minutes in the kitchen, start to finish. Risotto is famously involved, so expect to be well occupied most of those 45 minutes.

Start with slicing your mushrooms up; I left mine large entirely for no reason, dice yours if you want to.


Then chop up your shallots and garlic.


Heat up a skillet on medium heat and add a slab of butter, let it melt a bit.


Then add the shallots and garlic.


Let the shallots and garlic roast in the butter.


And then add your chopped mushrooms and sprinkle a bit of salt and pepper.


Mix them around well in the butter, get the mushrooms coated in the garlic and shallots.


Let the mushrooms cook for about 10 minutes until they are soft.


Then take them out of the pan and plate them for now.


Add a bit of olive oil to the pan, then add the Arborio rice and some thyme and rosemary into the pan, along with a pinch more salt and pepper.


Pour the wine in to deglaze the pan.


Let it all sizzle until the wine evaporates and the risotto thickens.


Now its time to start with the broth. The idea here is to add a bit of broth at a time; just enough to barely cover the rice.


And you have to keep stirring the rice, don't let it just sit in the broth. Keep stirring until you can separate the rice and it doesn't come back together. This is where risotto is a very involved dish; you can't set it up and walk away, then come back 10 minutes later. Stay on top of it, keep stirring the rice so that it cooks nice and evenly, and the stirring actually causes the rice to release starch, which is what gives risotto its creamy texture.


Now add a little more broth, again just enough to cover the rice.


And basically, repeat this process for about 10 to 15 minutes. After 15 minutes, just taste some of the rice to check if it is cooked al dente; the rice will be firm, but chewable. Once it is at this stage, keep stirring and don't add any more broth; just let the broth get absorbed into the rice, but don't let the rice dry out completely.


We can stop the cooking process now to ensure the rice does not cook itself into mush by turning off the heat and adding some crème fraîche.


Mix the crème fraîche in and then add your mushrooms back into the pan. Remember to pour back any butter than was on the plate with the mushrooms; this has the lovely flavours of garlic and shallots!


Mix the mushrooms into the rice, and your risotto is ready to serve!


For serving purposes, I sliced my parmesan instead of grating it.


And finally; serve the risotto in a plate or pasta bowl and top it with parmesan.


*Tip: Don't throw away your (portobello) mushrooms, refer to our "Let's not waste anything!" page, and check out few ideas on how to use your mushrooms.

As with all the other recipes we put on this site, this is meant to be easy to follow. We are hobby chefs who love to cook, and we are always up for learning new techniques. If you know of anything in this recipe which can be done a different way, whether for increased ease of preparation or better taste, please add a comment below!

Whipped up by Shyamal Addanki